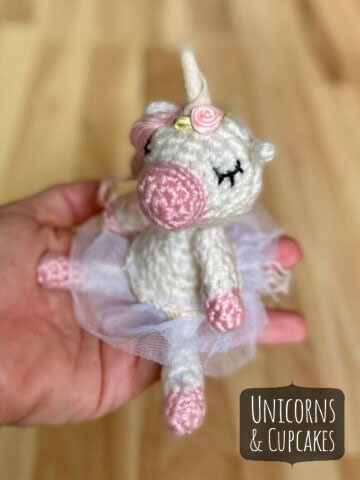
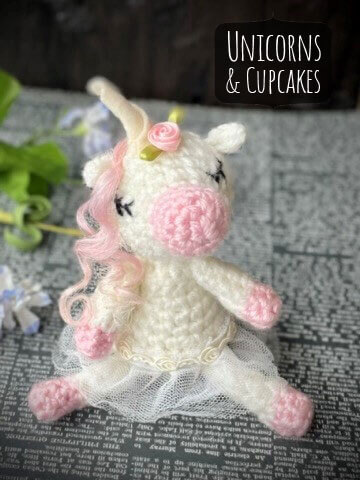
Magical creatures abound. Among our favorites, the unicorn. Wouldn’t you like to make a unicorn of your very own? This little 5″ crochet unicorn project will have you believing in magic! If you’ve never tried amigurumi (Japanese for crochet toys), you’re in for a treat. You only need a little knowledge of crochet and a few supplies. In a couple hours you’ll have your very own mini Unicorn. I’ve made the pattern as simple as possible so it’s very basic to follow. Here’s our girl now.
Supplies
For this project, you will need:
- yarn! I used worsted weight
- 3.5mm crochet hook (or similar size)
- yarn needle
- safety eyes, or black embroidery thread (or lightweight yarn)
- fiberfill stuffing (or a pillow)
- felt or fabric
- hot glue or sewing thread and needle
- doll hair (optional)
For amigurumi and other crochet and knitted toys, go small on the hook and work tighter stitches. As small as you can comfortably work. When the holes in the work are large, you can see the stuffing inside. No bueno.
I think the best tool for stuffing amigurumi is a plain ole pair of closed scissors (closed! round edge regular household scissors. Don’t stab yourself) Scissors seem to have enough texture to grab the stuffing and push it into the doll. I love molding and shaping the doll parts with stuffing and then kneading like clay.
Crochet Glossary
Magic Ring. Here’s a trick if you haven’t gotten the magic ring yet.
SC – single crochet
INC – increase. Single crochet two times in the same stitch
DEC – decrease. In this pattern, pull up a loop, pull up a loop in the next stitch, and crochet through all 3 loops
Unicorn Amigurumi 5″ Minis – Instructions
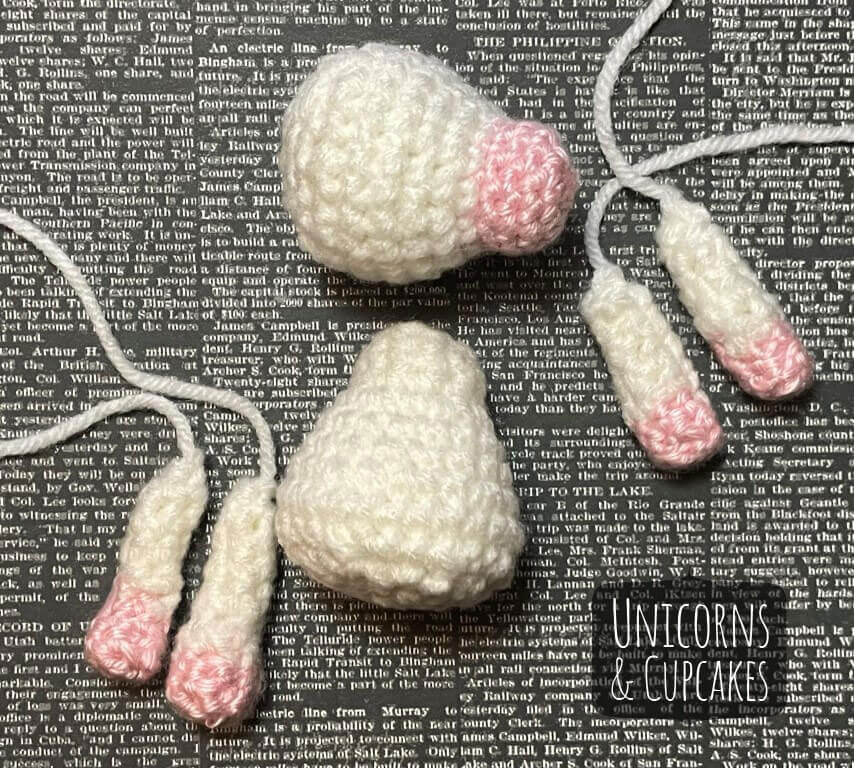
HEAD
Round 1- Magic Ring. SC 6 in the Magic Circle
2- INC – (SC in each) (12)
3-4 SC in each
– If using 2 yarn colors, switch colors here
5-6 * SC for 2 stitches. INC. * repeat around
7-8 SC each
9-10 * SC 2 stitches. DEC. * repeat
Start stuffing the head. If you are using safety eyes, install them now, prior to stuffing.
11 – DEC in each and bind off leaving enough yarn to sew the head to the body later. (10 to 12″)
Thread your yarn needle and sew around the circle. Pull closed.
Hide the extra yarn by pulling the yarn through the head and out the other side. Trim.
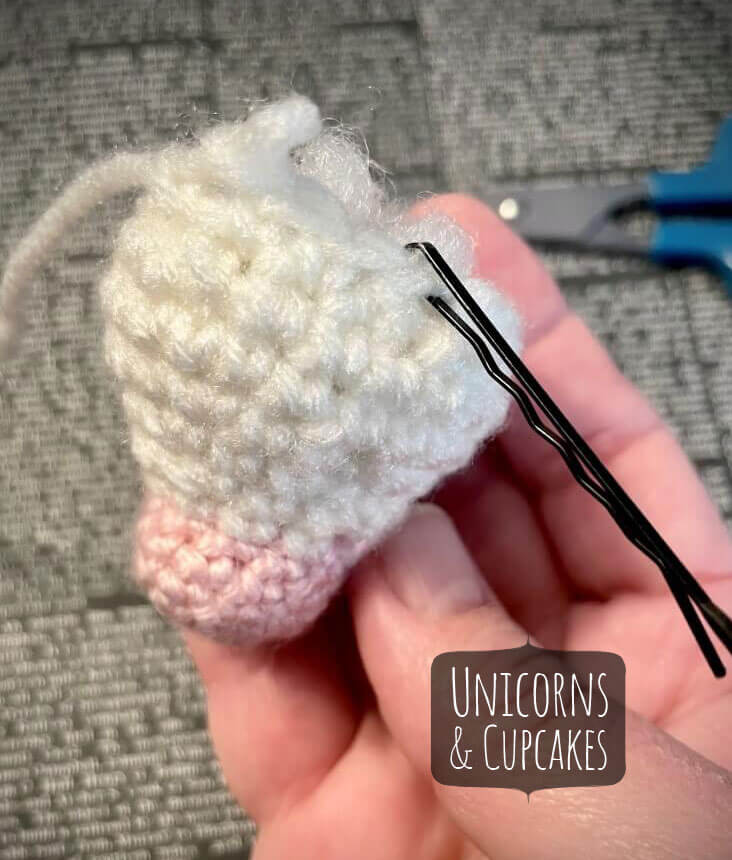
Unicorn Head. A good ole bobby pin has always been my stitch marker.
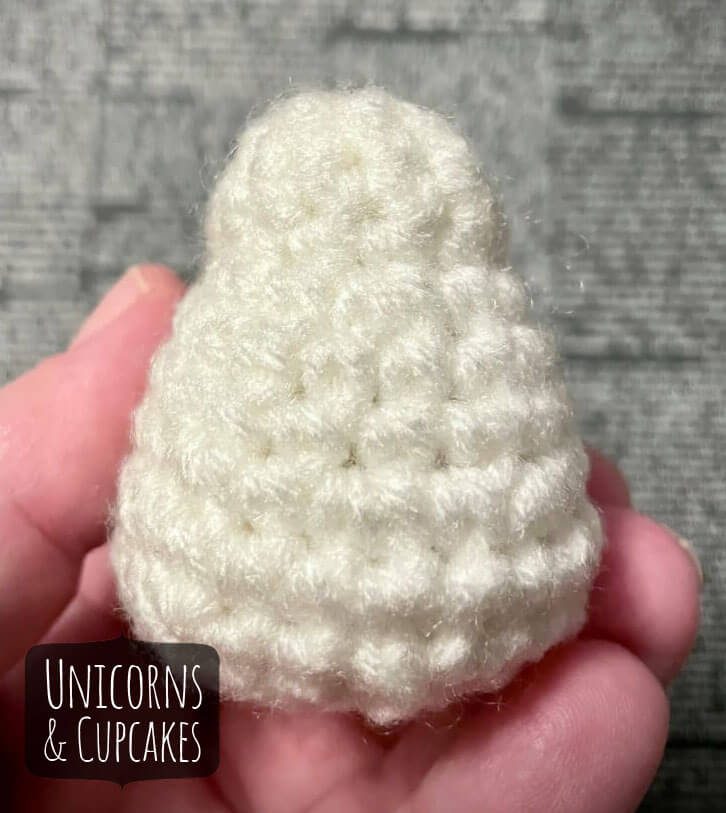
BODY
Round 1- Magic Ring. SC 5 in the Magic Circle
2- * SC 1 stitch. INC * repeat
3- * SC 3 stitches. INC * repeat
4-5 SC in each
6- * SC 1 stitch. INC * repeat
7- SC in each
8- * SC 1 stitch. INC * repeat
9- * SC 2. DEC * repeat
10- * SC 1. DEC * repeat
11- DEC all
Bind off leaving extra thread. Sew around the circle. Pull closed & bind off.
Tuck the yarn through the body and come out where the unicorn’s tail should be. We will do this again with the arms and legs and have a cute fluffy tail.
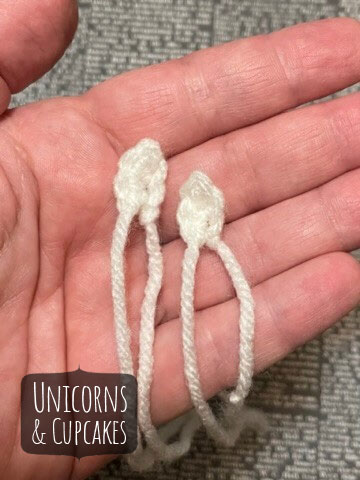
ARMS
1- Magic Ring. SC 6 in the Magic Circle
2- SC 6 around
– switch yarn color here if using 2 colors
3- SC 2 stitches. DEC. SC in 1.
4-6 SC in each
Bind off and leave 12 inches for sewing
LEGS
1- Magic Ring. SC 6 in the Magic Circle
2- SC 6 around
– switch yarn color here if using 2 colors
3- SC 2 stitches. DEC. SC in 1.
4-8 SC in each
Bind off and leave 10 inches
EARS
Slip Knot
Chain 3
In the 2nd chain from the hook, SC 2 back.
Bind off and leave extra for sewing.
SEW IT TOGETHER!
Head. Place the head atop the body and find the right spot, angle, and tilt that looks cute. Start in the back and work around. Just go slow and try to work as neatly as you can.
Arms. You can just sew the arms in place. Or. If you want moveable arms. Heres how: Hold one arm in place. Sew straight through the body and out the other arm. Tack the other arm with one stitch. Pull the yarn back to the first arm. Now your arms move! You can go back and forth a few times for sturdier arms.
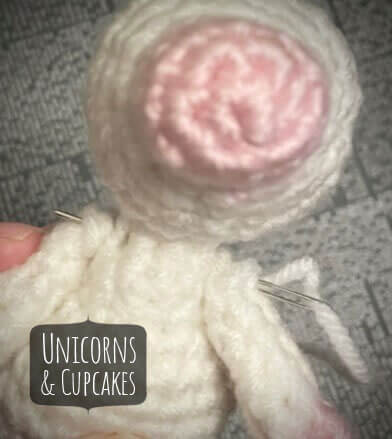
Remember to finish off the arm and legs by binding off and then pulling the extra yarn through the body and out the behind where a little tail should be.
Legs. Before adding the legs, shape the body so it can sit up mostly on its own. You can sew the legs straight onto the front of the body. It’s best if they are not moveable.
Ears. Place your ears leaving enough room for the eyes.
MAKING THE HORN
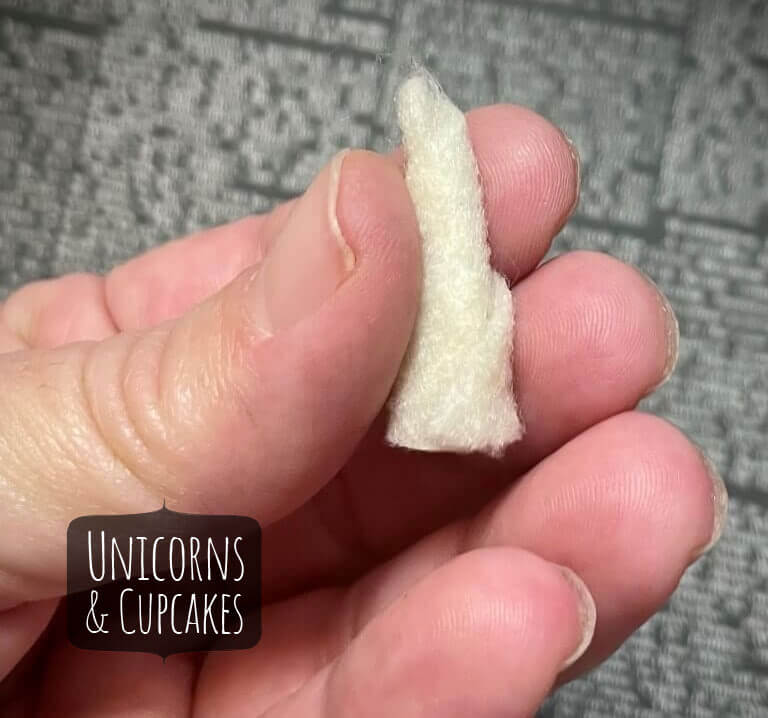
Crocheting a horn this size would be so difficult, so I went with felt. The easiest material to work with. I’ve also used regular material.
Cut your felt into (approximately) this shape. It doesn’t have to be perfect. We’ll be trimming a lot of this anyway.
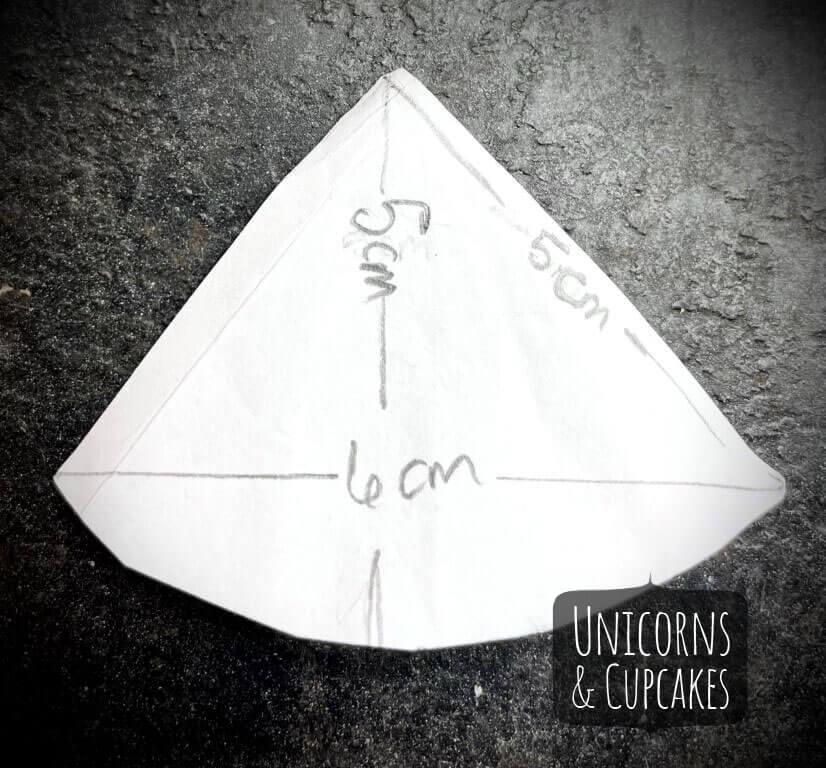
Start rolling, holding the tip. You may have to roll and twist a few times before the fabric wants to keep its shape.
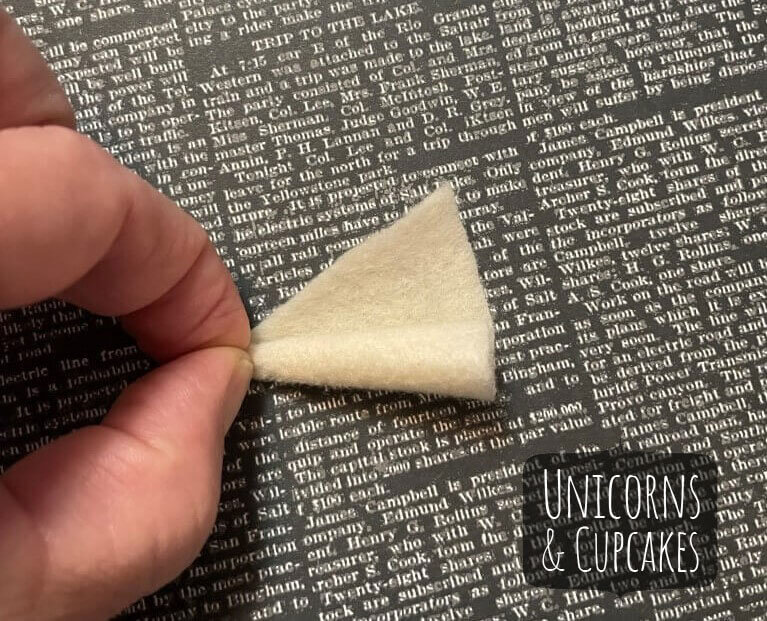
Sew or glue a dab to keep it rolled. Trim the bottom to size. Sew or glue on to your doll’s head.
ADDING HAIR
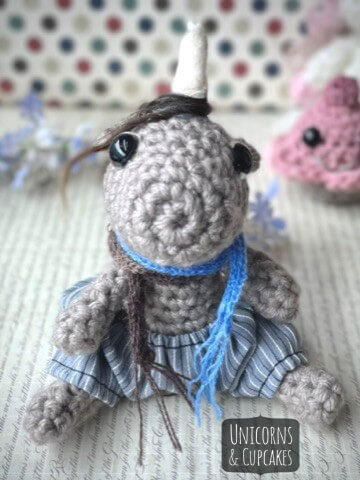
Yarn. Yarn makes for very sweet doll hair. Pull the loop of one strand of yarn through one stitch hole and knot off. Create a strip of hair from the horn to the back of the head like a horse’s mane.
Doll Hair. I make a few different dolls so I have a lot of doll hair here 😀 I used hot glue to make the mane. You’ll see the outcome in the remaining photos.
Eyes
If you’ve chosen to use safety eyes, you should have already added them before stuffing the head. If not, sleepy eyes are the way to go on the Unicorn dolls. Here Maleen on youtube to show you how.
CLOTHES
I think the thing that pushes stuffed toys into ultra-cuteness is little tiny clothes. For my girl unicorn, I gave her a tutu. This was merely a strand of tulle and a line of shiny trim.
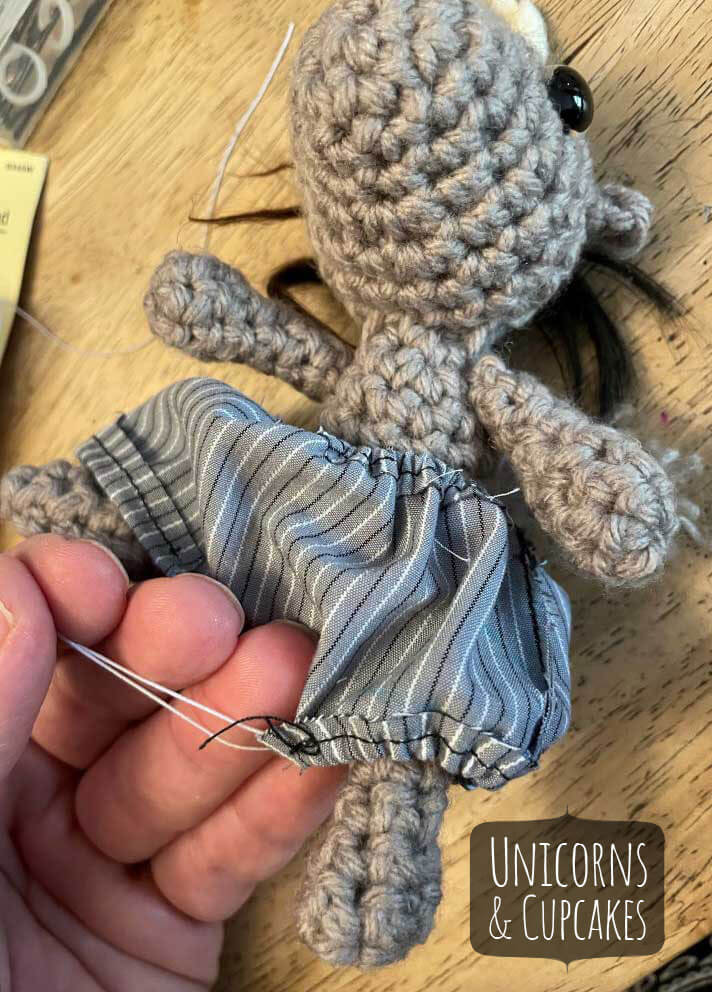
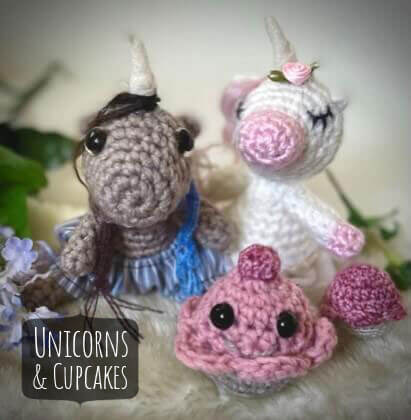
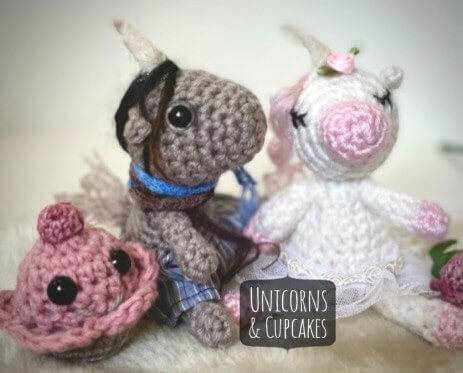
So I’m finished and very much in love with my little girl unicorn. But since I can’t stop crafting (have I mentioned that I can’t stop crafting?) I thought she needed a boyfriend. I went with more subdued colors and yes, more little clothes.
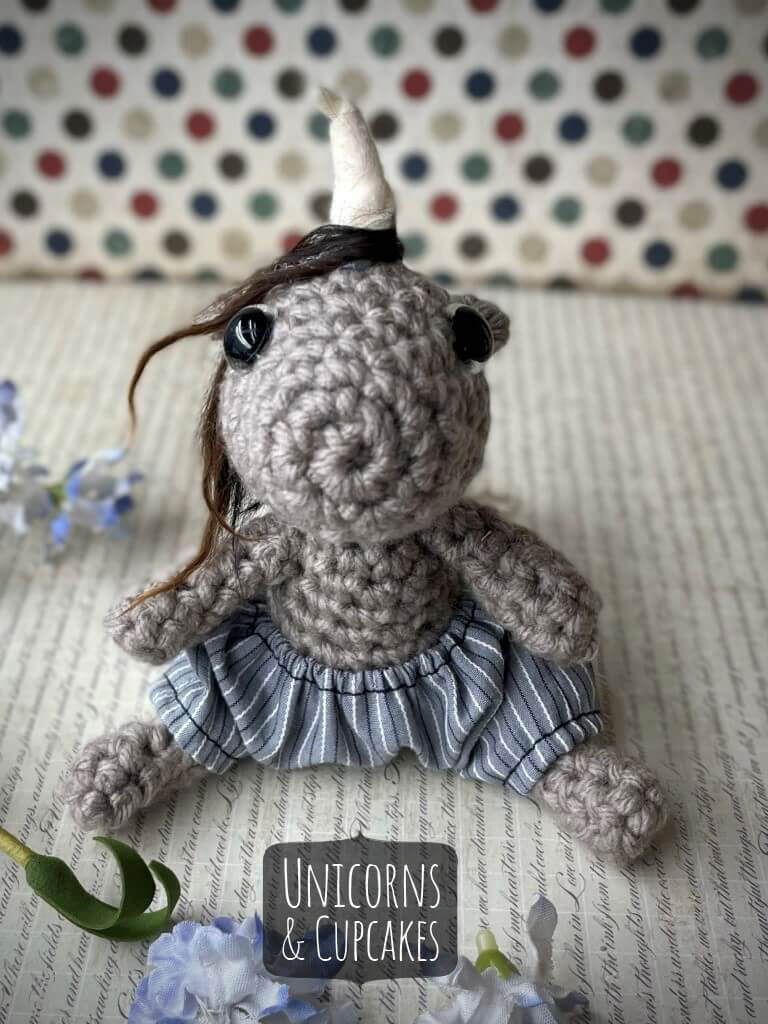
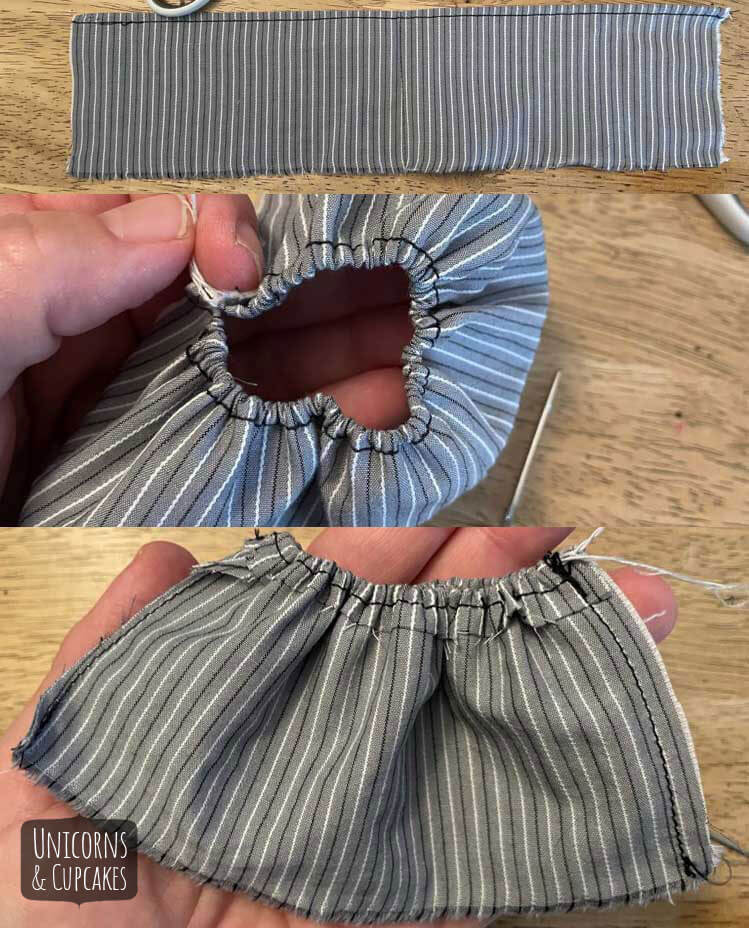
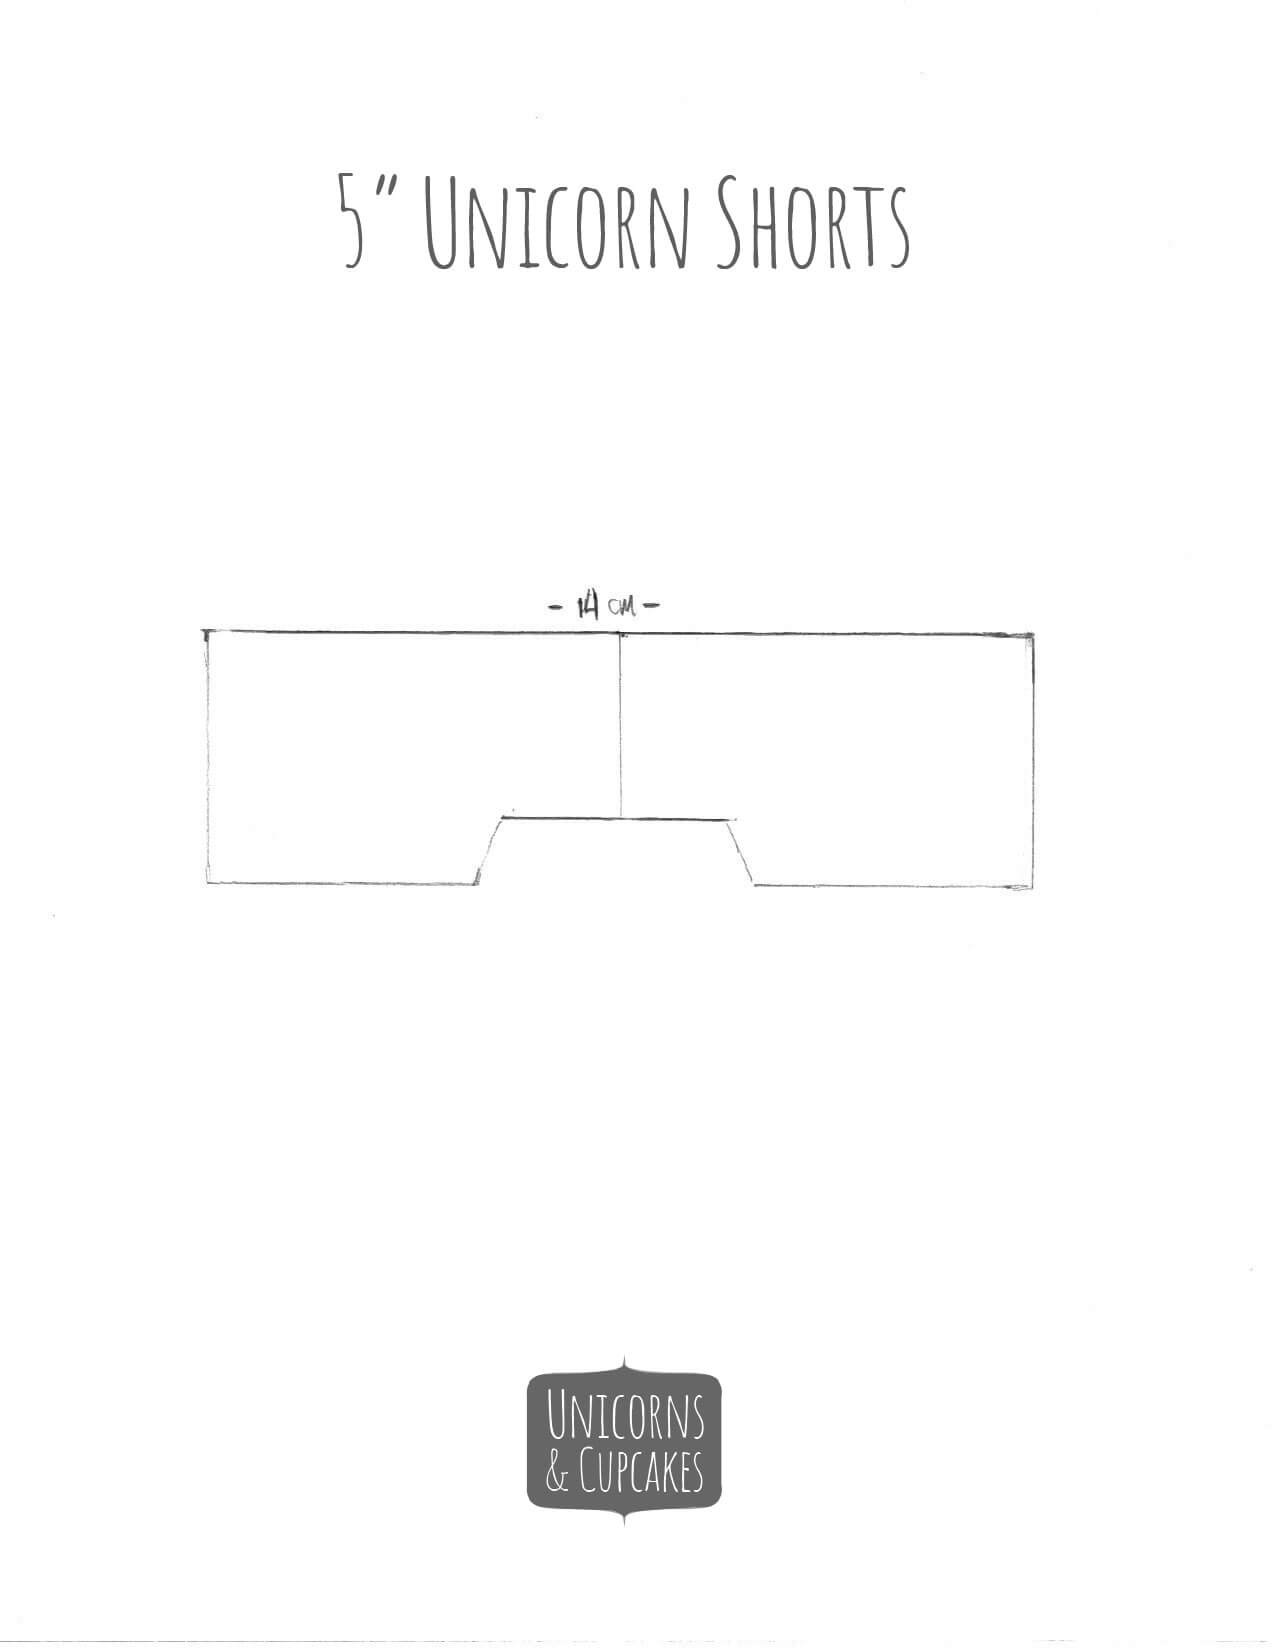
For my boy doll, I created shorts. Here’s the pattern. You can right-click and save this image to print it out. Measure the pattern to make sure it printed at 14cm wide. It doesn’t have to be perfect. The shorts are heavily gathered.
Cut 2 of the pattern. Sew down the right side to make 1 long strip. Make a hem at the top and pull some stretchy thread or elastic through and gather.